While not a major project I figure that this was worth a quick blurb on the site.
While working on the headphone DAC project I found myself in need of an SMD rework solution. At RIT I had access to great CEMA surface mount device soldering lab. Stocked with multiple SMT work stations this lab is also equipped with a full automated production line as well as some more exotic tools like an x-ray inspection station. This is where I did most of the work on the first populated PCB for the project.
Unfortunately I knew that I wouldn’t be around RIT forever and it was probably time to look into getting a soldering microscope.
While similar to the microscopes that most people are familiar with from high school biology a good soldering microscope must have some unique attributes that set it apart from its science lab brethren.
A good soldering microscope need not “zoom in” terribly far. It must have a large stage to work on and have sufficient room between the bottom of the optics and the stage to accommodate a pcb, soldering iron tip, tweezers, and hands holding onto everything. A soldering microscope will also often have a good even coverage light that shines down from the top onto the board being manipulated.


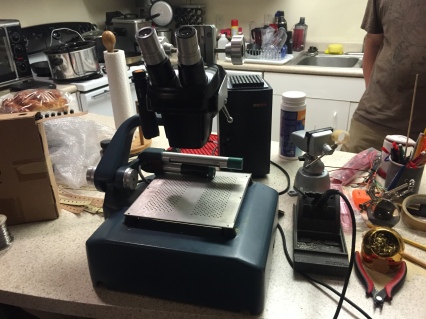
About 3 months into the school year some of my friends and I took a trip down to the Elmira Hamfest in upstate New York. towards the end of our time browsing the vendors’ tables I stumbled across one that had an old but usable looking stereo microscope sitting on it. Upon closer inspection I found that the microscope was set up almost perfectly for soldering. I made an offer and ended up carting it home for $100.
Despite being cobbled together from assorted parts that the previous owner must have had laying around the scope was optically quite functional. It just needed a working light as the lights that came with it were missing their power supply.
Once the built in lights were removed I fashioned a new light for the scope from a pcb led ring light originally designed to be mounted around the head of a 3d printer. This was wired to a new switch in the original control box on the scope. I also added a 12 volt computer fan to the under side of the stage of the microscope with the intent of drawing soldering smoke away from the user. This feature does not work quite as well as intended but it is useful for gently cooling off items recently soldered on the stage by pulling air past them.